Time: Popularity:0times
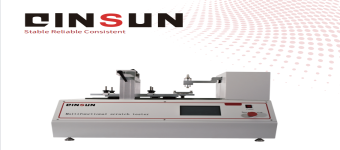
The automatic cross-cut tester is a versatile instrument for performing a variety of scratch and indentation resistance tests on paint and plastic surfaces. It can perform parallel and cross-cut scratching on test pieces of varying thicknesses using single or multi-row cutters. It specifically performs adhesion tests using the cross-cut method and scratch resistance tests according to GME 60 280. tailored to all user standards. A wide range of test parameters and a wide selection of test tools make these tests easy to perform.
Scratch Formation Mechanism
Cutting Tool: A multi-blade cutter with fixed-angle blades allows for precise control of scratch depth and width.
Electric Drive: A motor drives the blade downward at a constant speed, creating a cross-shaped grid on the coating surface, ensuring consistent scratch spacing and depth.
Pressure Control: Some high-end models offer adjustable scratching pressure to accommodate coatings of varying hardness.
Adhesion Assessment Method
Tape Peel Test: After scratching, apply specialized tape and quickly peel it off at a 180° angle to observe any coating peeling.
Grading Criteria: Based on the percentage of peeled area, graded according to international standards.
● Place the instrument flat on the test piece (If the test piece is smaller than the instrument, place the test piece in front of the instrument and place a spacer under the front of the instrument to keep the instrument level).
● Sharpen a pencil with a blade so that the tip protrudes approximately 3-5mm, then smooth it with sandpaper. Insert the pencil into the instrument, ensuring that the tip contacts the test piece and securely lock it. (Recommendation: The pencil is hexagonal, so select a flat surface for securing. After testing, rotate the two flat surfaces and secure again. Rotate the two flat surfaces again and secure again. You can use one circular surface three times.) Remove the spacer during testing.
● Use your thumb and middle finger to grasp the center of the two wheels. Push the instrument forward from the back about 1-2 cm. You can remove the instrument and use an eraser to erase the lead that has been scratched. (Do not apply any pressure when pushing the instrument);
● Determine the hardness and see if there are any scratches on the test piece. It is recommended to test the test piece in at least three positions and take the average value. The hardness level, from soft to hard: 6B.5B.4B.3B.2B.B.HB.F.H.2H.3H.4H.5H.6H, a total of 14 types; for example: using an H pencil, there are no scratches on the surface, using a 2H pencil, there are no scratches on the surface, and using a 3H pencil, there are scratches on the surface. The hardness of the test piece coating is: 2H
Regular Cleaning: Use a soft cloth or cotton ball dampened with an appropriate amount of anhydrous alcohol or detergent to gently wipe the surface and tip of the scribing tool. Avoid using abrasive cleaning agents to avoid damaging the instrument.
Scraping Tip Maintenance: Regularly inspect the scribing tip for wear. If the tip is worn or blunt, replace it promptly. A worn tip can affect the accuracy of the scribing tool.
Leveling: When using the scribing tool, keep it level and avoid vibration and tilt to ensure accurate test results.
Calibration: Regularly calibrate the scribing tool to ensure accurate measurement results. Calibration is usually performed by a professional testing instrument repair company or laboratory.
Dust and Moisture Protection: When not in use, keep the scribing tool dry and in a low-dust, low-humidity environment to prevent moisture and damage.
Instructions for Use: When using the scribing tool, follow the instructions in the operating manual and avoid excessive force or improper use to protect the sensitive components of the tool.
Regular inspection: Regularly check whether the components of the grid marker are normal. If there is any damage or abnormality, repair or replace it in time.


Company Phone
+86-21-6420 0566
Working hours
Monday to Friday
Mobile phone:
13816217984
Email:
info@qinsun-lab.com